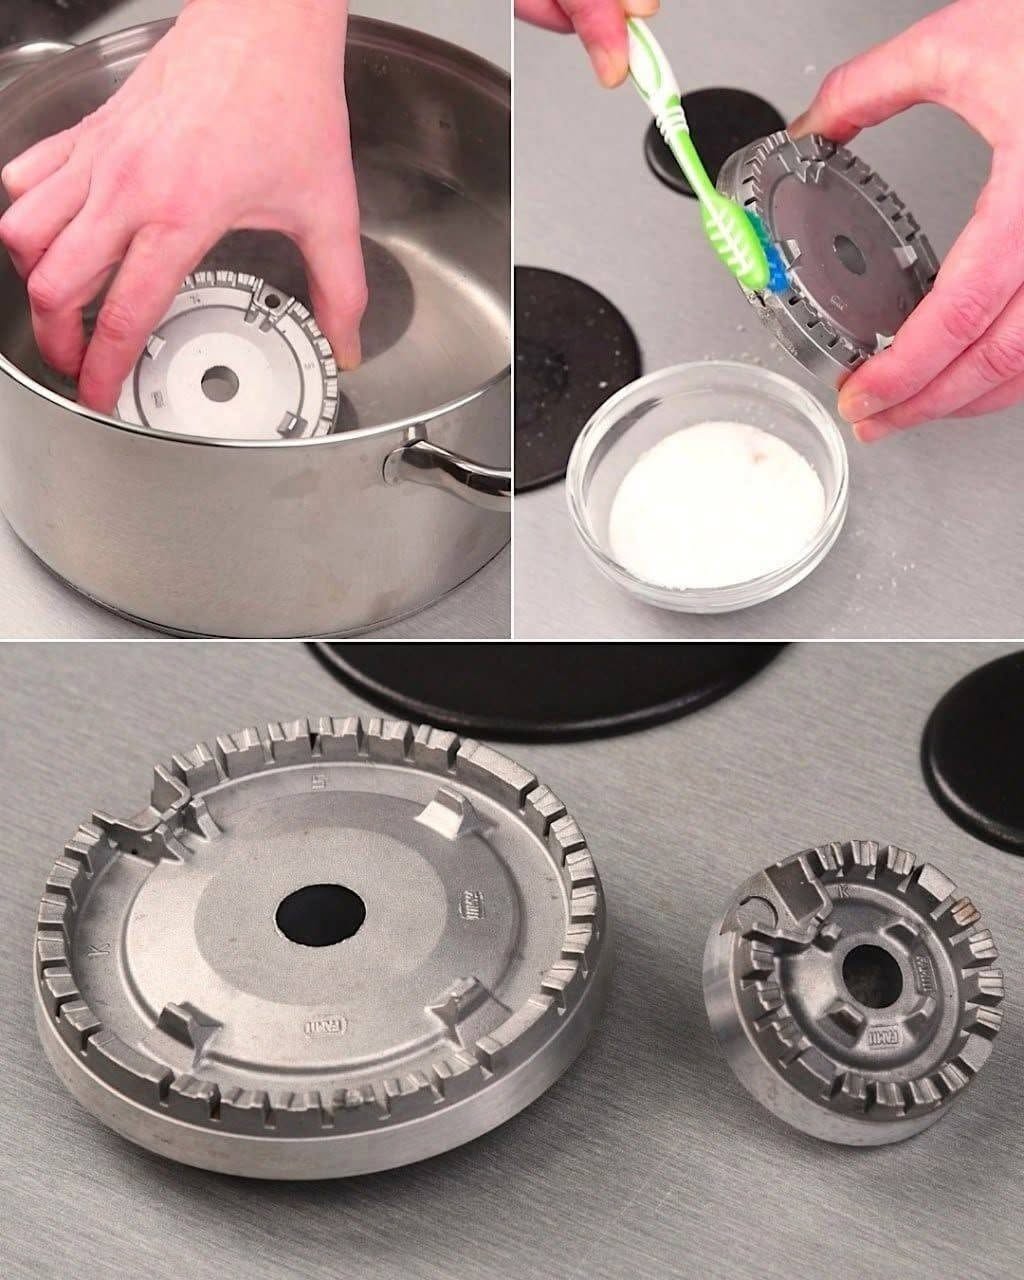
Gas hob burners can become surprisingly dirty over time. Grease, spilled sauces, burnt food, and cooking residue gradually collect around the burner caps and tiny flame openings.
At first, it may seem like only a cosmetic problem. But heavily soiled or clogged burners can also contribute to uneven flames, slow ignition, or burners that struggle to light properly.
Fortunately, you usually don’t need aggressive chemicals or hours of scrubbing to clean them.
Here’s a simple and safer method to bring dirty gas burners back to life.
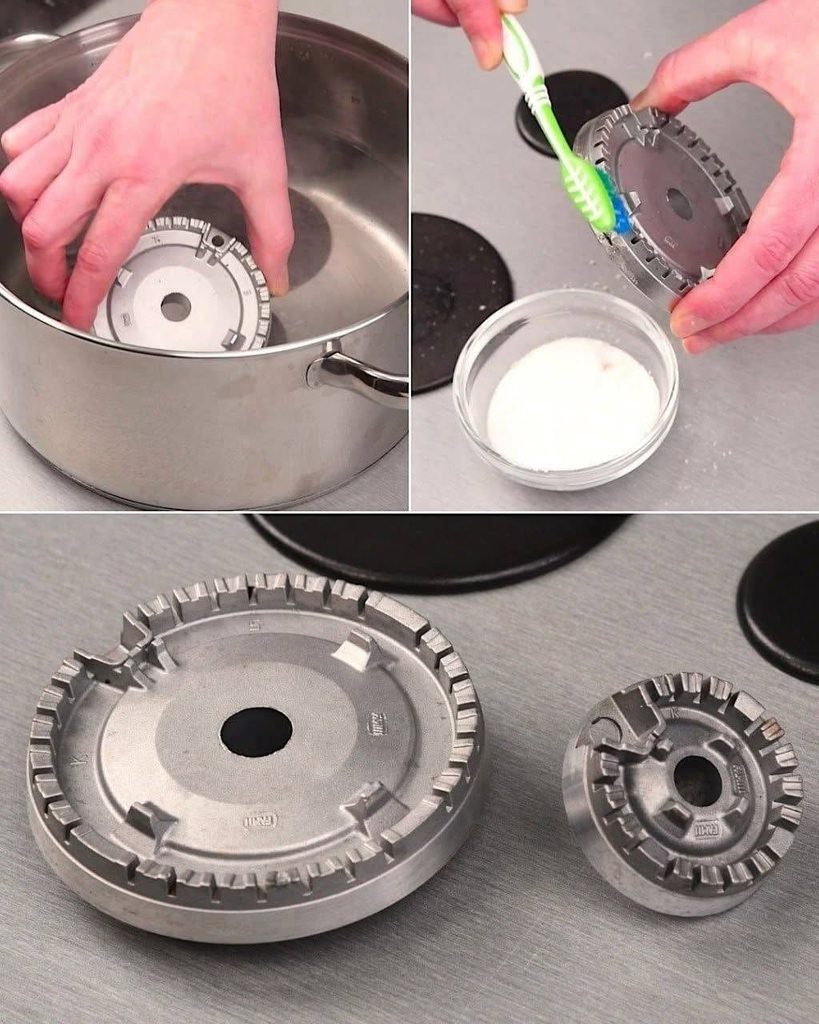
Why Gas Burners Get So Dirty
Every time you cook, tiny amounts of food, oil, and liquid can splash onto the stovetop.
Some spills are obvious and get wiped away immediately. Others reach underneath the burner cap or dry inside the small openings around the burner head.
Eventually you may notice:
- Brown or black stains
- Sticky grease
- Burnt-on food
- Clogged burner holes
- Uneven flames
- Difficulty lighting a burner
- Continuous clicking during ignition
Regular cleaning can prevent much of this buildup.
Before You Start: Safety First ⚠️
Before cleaning your gas hob:
Turn all burner controls OFF.
Wait until the cooktop and every burner component are completely cool.
If your cooktop uses an electrical ignition system and your appliance instructions recommend disconnecting power before deeper cleaning, do so.
Never attempt to clean burner components while they’re hot or while a burner is operating.
Step 1: Remove the Grates
Once everything is cool, carefully lift away the cooking grates.
Depending on your stove, these may be heavy cast iron or coated metal.
Place them on a protected surface.
Avoid banging heavy grates together because some finishes can chip.
Step 2: Remove the Burner Caps
Most modern gas hobs have removable burner caps.
Lift each cap straight upward.
Here’s an important trick:
Pay attention to where each burner cap came from.
Different burners may use different-sized caps, and putting the wrong one back afterward can cause poor ignition or an uneven flame.
If necessary, take a quick photo before removing everything.
Step 3: Check Your Manufacturer’s Instructions
Before soaking anything, check what your particular cooktop allows.
Gas burner designs aren’t identical.
Some removable burner components can safely be soaked in hot soapy water, while others require different cleaning methods.
The same applies to grates.
For example, uncoated cast-iron grates generally shouldn’t simply be left soaking in water, since prolonged moisture can encourage rust.
Your appliance manual should take priority over any viral cleaning hack.
Step 4: Soak Compatible Burner Parts 🫧
For removable parts that your manufacturer says can be soaked, fill a basin or suitable container with:
Hot water + mild dish soap.
Let heavily greasy parts soak for approximately 20–30 minutes.
The warm soapy water helps soften grease and baked-on food so you don’t have to scrub as aggressively.
Sometimes this step alone removes much of the grime.
Step 5: Use a Soft Brush
After soaking, use a soft-bristled cleaning brush or an old toothbrush to gently scrub away loosened residue.
Pay particular attention to:
Edges
Grooves
Undersides of burner caps
and other areas where grease accumulates.
A nonabrasive sponge or plastic scrubbing pad can also be useful when appropriate for your burner finish.
Avoid extremely aggressive scrubbing that could damage protective coatings.
What About Baking Soda?
The photo shows a common cleaning technique involving a white paste.
Baking soda is frequently used as a mild abrasive for stubborn kitchen grime.
For compatible removable parts, a simple paste can be made using approximately:
3 parts baking soda
1 part water
Apply it to stubborn grime and allow it to sit for around 20 minutes before gently scrubbing.
However, don’t assume baking soda is appropriate for every burner or stovetop finish.
Some appliance surfaces are more delicate than others.
Check your manufacturer’s instructions first.
Don’t Mix Random Cleaning Chemicals 🚫
One of the biggest mistakes people make with viral cleaning hacks is combining multiple household products.
More ingredients don’t necessarily mean better cleaning.
Avoid creating random mixtures containing:
Bleach
Ammonia
Oven cleaner
Rust remover
Acids
or other powerful chemicals.
Certain combinations can produce hazardous fumes, while others can damage the burner finish.
For routine cleaning, mild dish soap and water are often sufficient.
Step 6: Check the Tiny Burner Ports
Look closely around the burner head.
You’ll notice small holes or slots.
These are burner ports, and gas must flow through them properly to produce an even flame.
Food and grease can sometimes clog these openings.
This can cause part of the burner to light poorly while another section burns normally.
How to Clean Clogged Burner Ports
This part requires care.
Some manufacturers recommend using a:
Straight pin
Needle
or
Small-gauge wire
to gently clear debris from clogged burner openings.
The goal is only to remove the obstruction.
Never enlarge the hole.
Changing the size or shape of a burner port can interfere with proper burner operation.
Don’t Use Wooden Toothpicks
A toothpick may seem like the perfect tool because it’s small and non-metallic.
But there’s a problem.
Wood can break.
A tiny piece could become lodged inside the burner port and make the blockage worse.
For this reason, some manufacturers specifically advise against using wooden toothpicks for burner ports.
Be Extremely Gentle Around the Igniter ⚡
Many modern gas stoves use an electrical spark igniter located beside the burner.
It may look like a small ceramic component.
Don’t aggressively scrub it.
Don’t bend it.
Don’t flood it with cleaning liquid.
If necessary, gently wipe accessible dirt away using a lightly damp cloth according to your appliance instructions.
Avoid Getting Cleaner Into the Gas Opening
Cleaning the visible burner components is one thing.
Pouring cleaning liquid into the gas supply opening is another.
Never fill the burner assembly with:
Water
Soap
Vinegar
Baking-soda solution
or any other cleaning product.
Liquids and cleaning residue should be kept away from the gas opening and internal components.
Step 7: Rinse Removable Parts Thoroughly
If you’ve washed removable burner components with soap or another approved cleaner, rinse them thoroughly.
You don’t want detergent residue left behind.
Then comes one of the most important steps of the entire process.
Let Everything Dry COMPLETELY 💨
Don’t reinstall wet burner parts.
Moisture trapped around burner openings can interfere with ignition and may cause continuous clicking or difficulty lighting.
After rinsing, dry the components with a clean cloth.
Then allow them to air-dry completely if necessary.
Never rush this step.
A burner that worked perfectly before cleaning but suddenly won’t ignite afterward may simply still be wet.
Step 8: Clean the Stovetop Surface
While the burner parts are drying, clean the exposed cooktop.
Remove loose crumbs first.
Then use a soft cloth or nonabrasive sponge with an appropriate cleaner for your particular surface.
Different stovetops require different care.
Stainless steel, enamel, glass, and coated surfaces shouldn’t automatically be treated the same way.
Avoid steel wool and harsh abrasives unless your manufacturer specifically says they’re safe.
Be Careful With Stainless Steel
If your gas hob has a stainless-steel surface, aggressive scrubbing can leave permanent scratches.
Use a soft cloth or non-scratch sponge.
When appropriate, wiping in the direction of the stainless-steel grain can help maintain its appearance.
Step 9: Reassemble the Burner Correctly
Once everything is completely dry, reinstall each burner component.
Make sure:
The correct cap goes onto the correct burner.
The burner head is properly aligned.
The cap sits flat and centered.
Nothing rocks excessively from side to side.
A poorly positioned burner cap can cause ignition problems and uneven flames.
Why Is My Burner Clicking After Cleaning?
This is surprisingly common.
You finish cleaning the stove, turn the burner on, and hear:
Click… click… click… click…
but the burner doesn’t ignite normally.
One possible reason is moisture remaining around the burner head or ignition area.
Another possibility is incorrect burner-cap positioning.
Turn the burner off and check that everything is completely dry and correctly assembled.
If the problem persists, follow your appliance manufacturer’s troubleshooting instructions or contact a qualified technician.
Why Is the Flame Uneven?
Suppose half the burner produces a normal flame while the other half barely burns.
Possible explanations include:
Blocked burner ports
Food residue
Incorrect burner-cap placement
or other burner problems.
After cleaning, confirm that every component is properly seated.
If abnormal flames continue despite correct cleaning and assembly, professional inspection may be appropriate.
What Should a Normal Flame Look Like?
For many properly operating natural-gas cooktops, the flame is primarily blue.
However, flame characteristics can vary depending on the appliance, fuel type, environment, and other factors.
A persistent abnormal flame pattern, excessive soot, repeated ignition problems, or unusual burner behavior should be investigated rather than ignored.
Don’t Put Burner Caps in the Dishwasher Unless Approved
It’s tempting.
They’re dirty, removable, and made of metal—so why not?
Because dishwasher compatibility depends on the appliance.
Some manufacturers specifically advise against putting burner caps in the dishwasher.
Certain grates may be dishwasher-safe while the burner caps aren’t.
Always check the manual for your model.
Don’t Put Burner Parts in a Self-Cleaning Oven
Another viral cleaning trick suggests putting dirty stove components inside an oven during its self-cleaning cycle.
That’s not automatically safe.
Extremely high temperatures can damage some burner finishes or components.
Only use a cleaning method specifically approved by the manufacturer.
What About Vinegar?
Vinegar is useful for many household cleaning tasks, but it isn’t universally appropriate for gas hob components.
Acidic substances can affect certain finishes.
There’s also no need to automatically combine vinegar with baking soda.
When mixed together, the acid and base largely neutralize each other after the initial fizzing reaction.
The dramatic bubbles may look powerful, but bubbles don’t automatically mean superior cleaning.
Don’t Use Oven Cleaner Automatically
Oven cleaner is extremely powerful and isn’t necessarily suitable for gas burners.
Some manufacturers specifically warn against using oven cleaners on burner components.
The same applies to bleach and rust-removal chemicals.
Start with the gentlest approved cleaning method.
How Often Should Gas Burners Be Cleaned?
There’s no universal schedule that fits every household.
Someone cooking three meals every day will create more buildup than someone using the stove twice a week.
A good rule is:
Wipe spills once the stove is safely cool.
And inspect burner caps and ports regularly.
Don’t wait until the burners are covered with months of burnt grease.
Fresh residue is much easier to remove than hardened buildup.
Clean Spills Quickly
Tomato sauce, cooking oils, milk, pasta water, and other foods can overflow onto burner components.
Once the stove has cooled, wipe spills away promptly.
Leaving acidic or sugary foods on some finishes for extended periods can cause discoloration or damage.
A Simple Weekly Routine
If you cook frequently, a quick maintenance routine can prevent major buildup:
1. Allow the stove to cool completely.
2. Remove loose crumbs and food.
3. Wipe the cooking surface.
4. Inspect burner caps.
5. Clean visible grease.
6. Check that burner openings aren’t clogged.
7. Keep everything dry.
This takes much less time than restoring burners that haven’t been cleaned for months.
When Cleaning Won’t Fix the Problem
Cleaning can solve problems caused by grease, food residue, or blocked ports.
But it won’t repair a faulty gas appliance.
Stop using the affected burner and consider professional service if you notice:
Persistent failure to ignite
Repeated abnormal flames
Heavy soot
Damaged burner components
Cracked parts
Persistent electrical problems with the igniter
or other unusual behavior.
What If You Smell Gas? ⚠️
A strong or persistent gas smell isn’t a cleaning problem.
Don’t continue experimenting with the burner to see whether the smell disappears.
Turn off the appliance if it is safe to do so and follow the emergency guidance provided by your gas supplier or local authorities.
Avoid flames or anything that could create an ignition source.
A suspected gas leak requires appropriate professional attention.
The Biggest Burner-Cleaning Mistakes
Most gas hob cleaning problems come from a few common mistakes:
- Cleaning while components are still hot
- Using aggressive abrasive tools
- Pouring liquid into burner openings
- Flooding the igniter
- Using incompatible chemicals
- Enlarging burner ports while cleaning
- Using wooden toothpicks that can break inside ports
- Reassembling burners while wet
- Putting the wrong cap on the wrong burner
- Failing to seat burner caps correctly
Avoiding these mistakes can make the entire process much safer.
The Simple Method to Remember 🔥✨
For compatible removable gas burner components, the basic cleaning process is:
COOL → REMOVE → SOAK → GENTLY SCRUB → CLEAR BLOCKAGES → RINSE → DRY COMPLETELY → REASSEMBLE
That’s it.
You usually don’t need an aggressive chemical cocktail.
Warm soapy water, patience, and a soft brush can remove a surprising amount of grease and burnt food.
For particularly stubborn residue, an approved mild cleaning paste may help—but always check what your specific appliance manufacturer recommends first.
The Bottom Line
Dirty gas hob burners aren’t just unpleasant to look at.
Accumulated grease and food can interfere with burner openings and contribute to poor or uneven ignition.
Fortunately, regular cleaning can make a dramatic difference.
Remove compatible components only when everything is cool, soak washable parts in warm soapy water, gently scrub away grease, carefully clear clogged burner ports when necessary, and—most importantly—allow every component to dry completely before reassembly.
And remember:
Never enlarge burner openings, flood the gas or ignition components with cleaner, or assume every viral cleaning hack is safe for your stove.
A little routine maintenance can keep your gas hob cleaner, more reliable, and looking much better for years.