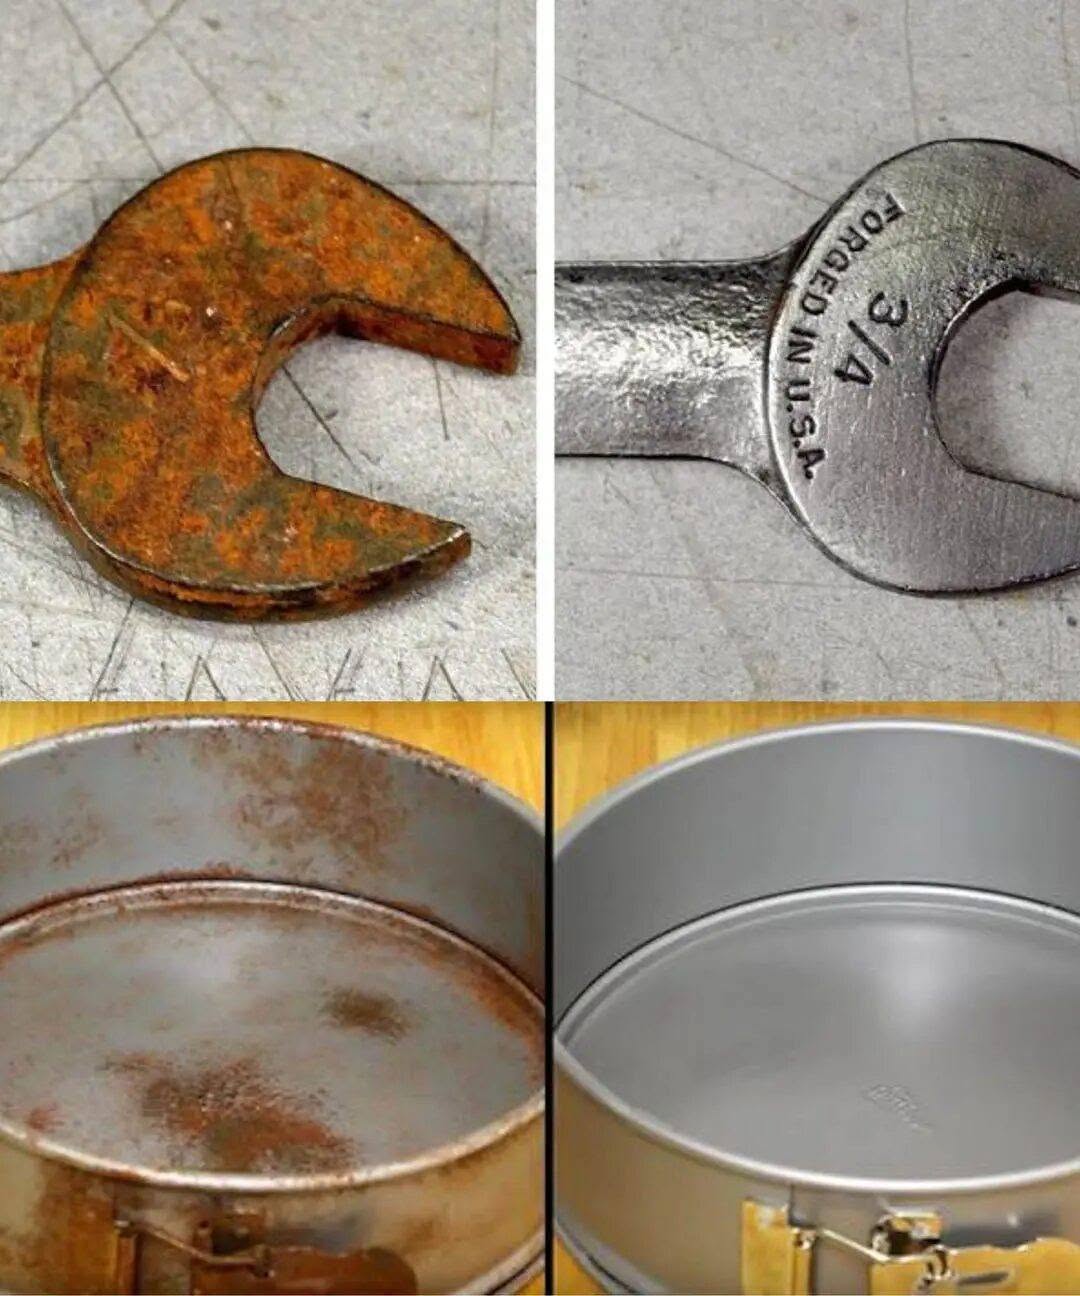
You open a drawer and discover that an old wrench has turned orange. A metal pan has developed brown spots. Garden tools that were once shiny are now covered with rust.
Before throwing them away, there’s good news: surface rust can often be removed, and some effective methods use inexpensive products you may already have at home.
One of the simplest is surprisingly ordinary:
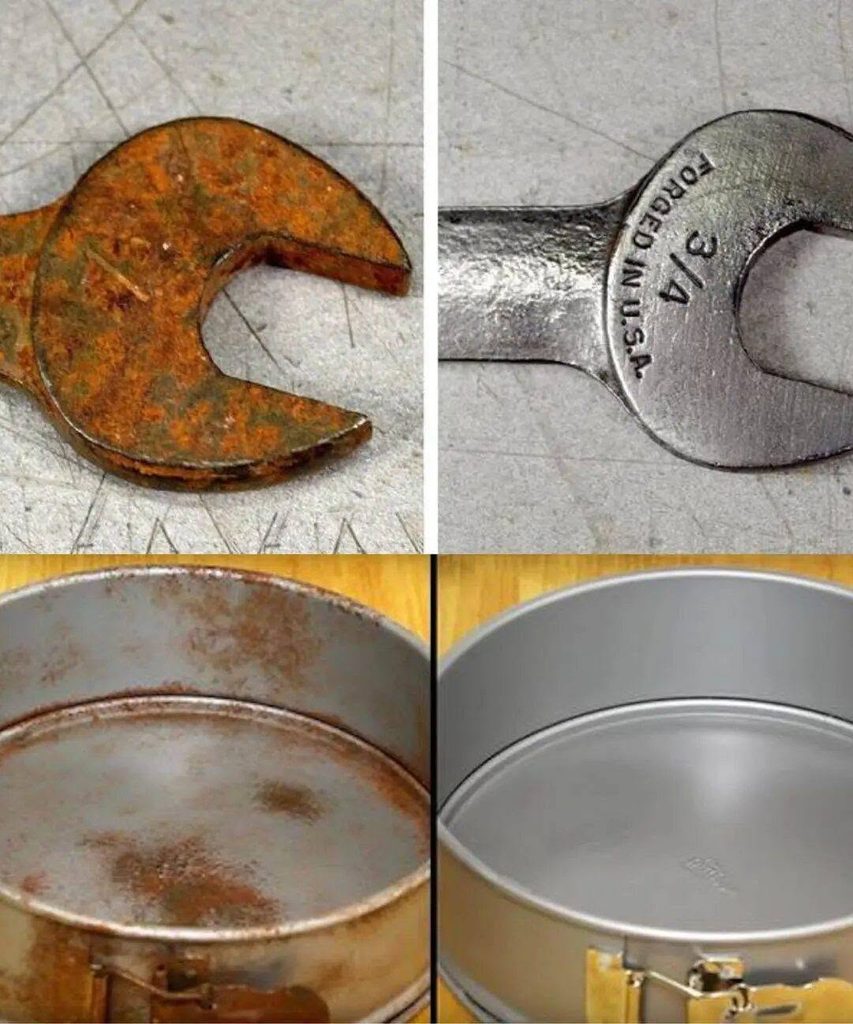
White vinegar.
Its acidity can help loosen and dissolve rust on many ordinary iron and steel objects. However, the right method depends on the type of metal and its finish, and leaving acidic cleaners on metal for too long can damage the underlying surface.
Here’s how to do it safely.
What Is Rust?
Rust forms when iron or steel reacts with oxygen and moisture over time.
That’s why objects kept in damp environments are particularly vulnerable.
You may notice rust on:
- Wrenches and screwdrivers
- Garden tools
- Screws and bolts
- Metal furniture
- Certain cookware
- Garage equipment
- Bicycle components
At first, rust may appear as a few orange-brown spots.
If corrosion continues for a long time, however, it can eventually pit and weaken the metal.
That distinction matters because cleaning can remove surface rust, but it cannot rebuild metal that has already corroded away.
Method 1: White Vinegar for Rusty Tools
For many small, uncoated iron or steel objects, white vinegar can be an effective starting point.
You’ll need:
White vinegar
A plastic or glass container
A brush or scouring pad
Clean water
A dry cloth
Protective gloves
Step 1: Clean Off Dirt and Grease
Before treating the rust, remove surface dirt.
Wash the object with mild dish soap and water if appropriate for the item.
Grease can prevent the vinegar from contacting the rusty surface effectively.
Dry it afterward.
Step 2: Soak the Rusty Metal
Place the rusty metal portion in a container and add enough white vinegar to cover it.
Let the acid work on the corrosion.
Light surface rust may loosen relatively quickly, while heavier rust can require a longer soak.
Check the object periodically rather than automatically leaving it submerged for days.
Why?
Because vinegar doesn’t know when the rust is gone.
Once the corrosion has been removed, prolonged acid exposure can begin affecting the underlying metal or finish.
Step 3: Scrub Away the Loosened Rust
Remove the object and gently scrub the rusty areas.
Depending on the object, you might use:
- A nylon brush
- A scouring pad
- Fine steel wool
- A wire brush for suitable unfinished tools
You should notice that softened rust comes away much more easily than before.
For delicate or polished surfaces, start with the least abrasive option.
Step 4: Rinse Thoroughly
Once the rust has been removed, rinse away the remaining vinegar and loosened residue.
Don’t leave acidic liquid sitting on the metal.
Step 5: Dry Immediately
This is one of the most important steps.
Water contributed to the rust problem in the first place.
After rinsing, dry the object completely and immediately.
Pay attention to:
Joints
Screw holes
Crevices
Handles
Edges
Moisture trapped in these areas can encourage rust to return.
The Most Important Step Comes AFTER Cleaning
Removing rust is only half the job.
Freshly cleaned iron or steel can begin oxidizing again when exposed to moisture and oxygen.
Depending on the object, protect it afterward with an appropriate:
Light oil
Tool lubricant
Wax
Protective coating
or
Rust-resistant paint.
Choose a finish appropriate for how the object will be used.
Obviously, a wrench and a cooking pan shouldn’t receive the same protective product.
Method 2: Baking Soda for Light Rust
If the rust is relatively mild, baking soda can sometimes help.
Mix baking soda with a little water until you create a thick paste.
Spread the paste over the rusty areas.
Allow it to sit for a while.
Then gently scrub using an appropriate brush or pad.
Rinse and dry completely.
Baking soda works partly as a mild abrasive, so avoid aggressive scrubbing on surfaces that scratch easily.
Method 3: Lemon and Salt 🍋
Another household approach uses lemon juice.
Lemon contains citric acid, which can help loosen rust.
For appropriate metal objects:
Sprinkle salt over the rusty area.
Apply lemon juice.
Allow the mixture some time to work.
Then gently scrub.
Rinse thoroughly and dry immediately.
Again, acidic treatments shouldn’t be left indefinitely on metal.
Which Method Is Best?
For an ordinary rusty steel tool, vinegar is often one of the easiest approaches.
For a small area of light surface rust, baking soda and gentle scrubbing may be enough.
For localized rust, lemon juice can also be useful.
But the material matters more than the viral cleaning hack.
Before using any method, ask:
What is this object actually made from?
Don’t Treat Every Metal the Same Way ⚠️
This is where many viral cleaning posts become misleading.
A method that works beautifully on an old steel wrench could damage another object.
Be especially cautious with:
Plated metals
Painted surfaces
Antiques
Decorative finishes
Aluminum
Copper
Chrome
Certain stainless-steel finishes
Nonstick cookware
When the finish is valuable or you’re uncertain about the material, test your cleaning method on a small hidden area first.
What About Stainless Steel?
Despite its name, stainless steel isn’t completely immune to staining or corrosion.
Small rust spots can sometimes appear.
For stainless steel, aggressive steel wool isn’t necessarily a good idea because it can scratch the surface and potentially leave particles behind.
A baking-soda paste and soft cloth or soft brush may be a gentler starting point for light rust.
When cleaning brushed stainless steel, work with the direction of the grain rather than aggressively across it.
What About Chrome?
Chrome requires another approach.
The shiny chrome layer can be relatively thin, and aggressive abrasives may scratch or remove the finish.
Before attacking a chrome faucet, appliance component, or decorative object with steel wool, make sure the method is appropriate.
What looks like an extremely strong cleaning technique can leave permanent scratches.
Rust on Cookware Requires Extra Care 🍳
If the rusty object touches food, don’t automatically use whatever product you would use on a garage tool.
Commercial rust removers, lubricants, paints, and protective coatings may not be food-safe.
Cast-iron cookware, for example, generally requires its own restoration process.
Removing Rust From Cast Iron
If a cast-iron pan develops rust, don’t necessarily throw it away.
For manageable surface rust, the pan can often be restored.
The basic process generally involves:
Removing the rust
Washing and rinsing the pan
Drying it thoroughly
and then
Re-seasoning the cast iron.
A diluted vinegar soak can help with substantial rust, but it shouldn’t continue indefinitely because acid can begin attacking the iron once the rust is gone.
After rust removal, re-seasoning helps restore the protective cooking surface.
Don’t Use Tool Lubricant on Cookware
This sounds obvious, but viral cleaning tips sometimes blur the line between household tools and cooking equipment.
A lubricant that protects a garage wrench from corrosion isn’t necessarily appropriate for a frying pan.
Anything that comes into contact with food needs a food-safe treatment.
What About Rusty Knives? 🔪
Knives require caution for two reasons.
First, they’re sharp.
Second, aggressive rust removal can damage the blade’s finish or edge.
For minor rust, use a cleaning method appropriate for the blade material and keep your hands away from the cutting edge.
If corrosion is severe enough to create deep pits near the edge, professional sharpening or replacement may be safer.
Can Cola Remove Rust?
You’ve probably heard this famous trick.
Certain acidic beverages may loosen light rust, but they’re generally sticky and aren’t necessarily the most practical option.
White vinegar or a purpose-designed rust treatment is usually more straightforward.
You don’t need to pour your favorite drink over every rusty object.
Can You Mix Vinegar and Baking Soda?
You can—but don’t assume the dramatic fizz makes the mixture a super-powered rust remover.
Vinegar is acidic.
Baking soda is alkaline.
When they’re mixed, they react with one another.
The bubbling looks impressive, but the ingredients also partially neutralize each other.
For rust removal, using them separately and intentionally can make more sense.
Never Mix Random Cleaning Chemicals 🚫
Don’t turn rust removal into a chemistry experiment.
In particular, never mix household cleaning products just because a social-media video says the reaction looks powerful.
Some combinations can create dangerous fumes.
More bubbles do not necessarily mean more cleaning power.
Choose one appropriate method and use it correctly.
When Scrubbing Works Better Than Soaking
Not every rusty object needs hours in vinegar.
For very light surface rust, mechanical removal may be enough.
Fine sandpaper, a suitable abrasive pad, or a wire brush can remove rust from appropriate unfinished steel surfaces.
Start gently.
Use increasingly aggressive abrasion only when necessary.
Remember that every abrasive removes some material—not just rust.
When a Wire Brush Helps
For rugged steel tools with substantial rust, a wire brush can be extremely useful after soaking.
It can remove loosened corrosion from textured surfaces and crevices.
Wear eye protection when brushing vigorously because small particles can break free.
Gloves can also protect your hands from sharp edges and debris.
What If the Rust Is Extremely Thick?
Heavy rust can create:
Flaking
Deep pits
Missing material
Weak areas
Holes
At that stage, cleaning may improve appearance without restoring the object’s original strength.
This is particularly important with objects where structural integrity matters.
A heavily corroded load-bearing component shouldn’t automatically be considered safe simply because you’ve removed the orange rust.
Can a Rusty Tool Become “Like New”?
Sometimes visually, yes.
Structurally, not always.
Surface rust may leave very little permanent damage.
Deep corrosion is different.
Once rust has eaten into the metal, removing the corrosion doesn’t replace the missing material.
Think of rust removal as cleaning and preserving what’s left—not magically rebuilding the metal.
Why Does Rust Come Back So Quickly?
You clean a tool until it’s shiny.
Two weeks later, orange spots return.
Why?
Usually because the conditions that caused the rust haven’t changed.
Common reasons include:
Humidity
Damp storage
Water left on tools
Outdoor exposure
Damaged protective coatings
Salt exposure
Removing rust without addressing moisture often means you’ll have to repeat the process.
How to Stop Rust From Returning
Prevention is easier than repeatedly removing corrosion.
Keep Metal Dry
After cleaning or using metal tools, wipe away moisture.
Never put a wet tool directly into a closed toolbox.
Store Tools Somewhere Dry
A damp basement, garage, or outdoor shed can encourage corrosion.
Keep tools away from persistent moisture when possible.
Apply Appropriate Protection
Bare steel can benefit from a thin protective layer of appropriate oil, wax, coating, or paint depending on the object.
This creates a barrier between the metal and moisture.
Repair Damaged Paint
Paint isn’t only decorative on many metal objects.
It also protects the metal underneath.
If paint chips away and exposes steel, rust may begin at the damaged area.
Cleaning the rust and restoring the appropriate protective coating can help prevent recurrence.
Clean Garden Tools After Use 🌱
Soil can hold moisture against metal.
After gardening:
Remove soil.
Clean the metal surfaces.
Dry them.
Store the tools somewhere protected from rain and humidity.
A little maintenance can dramatically extend their useful life.
What About Salt?
Salt accelerates corrosion in many situations.
That’s particularly important for tools, bicycles, vehicles, and other metal objects exposed to coastal air or road salt.
If metal has been exposed to salt, appropriate cleaning and drying become even more important.
A Simple Rust-Removal Routine
For an ordinary unfinished steel tool with manageable surface rust, try this:
1. Clean away dirt and grease.
2. Place the rusty metal in white vinegar.
3. Check it periodically as the rust loosens.
4. Remove it and scrub gently.
5. Repeat briefly if necessary.
6. Rinse thoroughly.
7. Dry completely.
8. Apply an appropriate protective coating.
It’s simple, inexpensive, and doesn’t require an exotic chemical mixture.
What You Should NOT Do
Avoid these common mistakes:
Don’t leave metal in vinegar indefinitely.
Don’t aggressively sand a polished or plated finish.
Don’t use steel wool on every metal surface.
Don’t mix random cleaning chemicals.
Don’t leave the object wet after cleaning.
Don’t apply non-food-safe chemicals to cookware.
Don’t assume removing rust restores lost structural strength.
Don’t use heavily corroded safety-critical equipment without checking its condition.
When Should You Replace the Object?
Sometimes restoration isn’t worthwhile.
Consider replacement when corrosion has caused:
- Deep structural damage
- Large holes
- Severe pitting
- Cracks
- Significant thinning
- Dangerous weakness
This is especially important for objects that carry weight, cut, hold pressure, or have another safety-critical function.
A shiny surface doesn’t guarantee that the metal underneath remains strong.
The Bottom Line 🔧✨
You don’t always need an expensive chemical rust remover to rescue an old metal object.
For many ordinary iron and steel tools, white vinegar can loosen surface rust surprisingly well. Baking soda, lemon juice, gentle abrasion, and other methods can also work depending on the object.
The secret isn’t simply removing the orange layer.
The complete process is:
Loosen the rust → scrub it away → rinse → dry completely → protect the metal.
And remember that different metals and finishes require different care.
Before soaking a valuable antique, polished appliance, plated object, or piece of cookware in anything, identify the material first.
With the right approach, that rusty old tool you were about to throw away may still have plenty of life left in it.