Kitchen cabinets can completely change the appearance of a kitchen. When they’re clean and shiny, the entire room feels brighter and fresher.
But over time, something happens.
Cooking grease, steam, fingerprints, dust, and tiny food splatters slowly build up on cabinet doors. Eventually, cabinets that once looked beautiful begin to look dull, sticky, and dirty.
The good news?
You usually don’t need to replace or repaint them.
A simple cleaning routine using products you probably already have at home can make a noticeable difference.
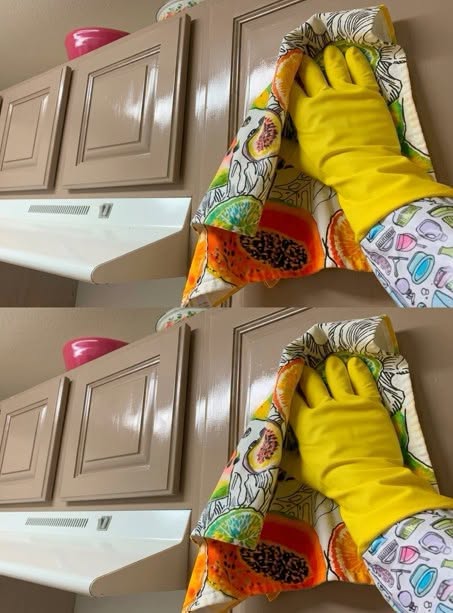
Why Do Kitchen Cabinets Become So Greasy?
Every time you cook, tiny particles of oil and moisture can travel through the air.
They eventually settle on nearby surfaces—especially cabinets around the stove.
Then dust sticks to that oily film.
After weeks or months, you’re left with a stubborn layer of grime that an ordinary dry cloth won’t easily remove.
Areas around handles are often even worse because they’re touched constantly.
The Simple Solution to Try First
For most finished wood, painted, and laminate cabinets, one of the safest places to start is surprisingly simple:
Warm water + mild dish soap.
Dish soap is designed to cut through grease, which is exactly what tends to accumulate on kitchen cabinets. A damp—not soaking wet—microfiber cloth is recommended, especially for wood surfaces.
You’ll Need
- A bowl of warm water
- A few drops of mild dishwashing liquid
- 2 clean microfiber cloths
- A soft toothbrush for small corners, optional
- A dry towel
That’s it.
You don’t need an aggressive chemical cleaner for ordinary buildup.
Step 1: Remove the Dust
Before using water, quickly wipe the cabinet doors with a clean microfiber cloth.
Pay particular attention to:
- The tops of cabinet doors
- Corners
- Decorative grooves
- Areas around handles
Removing loose dust first prevents you from simply spreading it around once the surface becomes damp.
Step 2: Prepare Your Cleaning Mixture
Fill a bowl with warm water.
Add just a few drops of mild dish soap and mix gently.
You don’t need lots of soap.
Too much can leave behind a residue and make your cabinets look streaky instead of shiny.
Step 3: The Most Important Part
Dip your microfiber cloth into the solution and wring it out extremely well.
The cloth should be:
Damp, not dripping wet.
This is particularly important for wood, veneer, and cabinets with seams because excessive moisture can damage some materials and finishes.
Step 4: Start Wiping
Work on one cabinet door at a time.
Gently wipe from top to bottom.
You’ll probably notice the biggest buildup:
- Around handles
- Near the stove
- Above the microwave
- Around frequently opened doors
Don’t immediately start scrubbing aggressively.
Give the soap time to loosen the grease.
The Trick for Stubborn Sticky Grease
Here’s where patience works better than force.
If you encounter a particularly greasy spot, hold your warm, damp, soapy microfiber cloth against it for about 15–30 seconds.
Then gently wipe.
This helps soften stubborn residue without immediately reaching for abrasive scrubbers.
Repeat if necessary.
Clean Around the Handles
This is one area people often miss.
Grease from our hands accumulates around knobs and handles surprisingly quickly.
Use your microfiber cloth to clean carefully around them.
For tiny grooves that your cloth can’t reach, a soft toothbrush can help—but don’t scrub aggressively.
Then Wipe Away the Soap
Take another clean microfiber cloth and lightly dampen it with plain water.
Wring it out thoroughly.
Wipe the cabinet again to remove remaining soap and loosened grime.
You may be surprised by how much dirt comes off.
Dry Immediately
Don’t leave your cabinets wet.
Use a clean, dry microfiber cloth to remove remaining moisture.
This is particularly important with wood cabinets.
It also helps prevent water marks and streaks.
What About Vinegar?
This is where many viral cleaning hacks can get confusing.
You’ll frequently see recipes recommending equal parts vinegar and water for absolutely everything in the house.
Vinegar can work on certain compatible surfaces, but it isn’t automatically the best choice for every cabinet finish.
Its acidity may dull or damage certain wood finishes, painted surfaces, waxed wood, or damaged coatings. Current cleaning guidance recommends checking the manufacturer’s instructions and testing any cleaner in an inconspicuous area first.
For that reason, mild dish soap and warm water are a safer starting point for many cabinet types.
What About Baking Soda?
Baking soda is another popular internet cleaning ingredient.
It can help with some stubborn stains, but remember that it’s mildly abrasive.
You don’t want to aggressively scrub a glossy or delicate finish with it.
If you’re considering using baking soda on stubborn grime, first check that it’s suitable for your cabinet finish and test it somewhere hidden.
Sometimes repeating the gentle dish-soap treatment is all you need.
Don’t Make This Common Mistake
When cabinets are extremely dirty, the temptation is to think:
“I need something stronger.”
So people reach for bleach, ammonia, abrasive powders, rough sponges, or powerful solvents.
That can turn a cleaning problem into a damaged-finish problem.
Harsh chemicals and abrasive cleaners can damage certain cabinet finishes.
Start gentle.
You can always increase your cleaning effort gradually.
Repairing a stripped or scratched finish is much harder.
Different Cabinets Need Different Care
This is important because there isn’t one homemade cleaner that’s perfect for every kitchen.
Finished Wood
Use minimal moisture and dry immediately.
Never soak wood.
Painted Cabinets
Be gentle because aggressive scrubbing can dull or remove paint.
Laminate
Usually easier to clean, but moisture should still be kept away from damaged seams and edges.
Unsealed Wood
This requires much more caution because moisture can penetrate the material.
If you know the manufacturer of your cabinets, follow its care instructions whenever possible.
The Hidden Area Most People Forget
Look up.
The tops of upper kitchen cabinets can accumulate an incredible mixture of grease and dust.
Because they’re rarely visible, they may go months—or years—without being cleaned.
When you finally wipe them, you may find a thick sticky layer.
Start with warm soapy water and work gradually.
Don’t immediately attack the surface with an abrasive scrubber.
How to Keep Cabinets Shiny Longer
The easiest grease to remove is the grease that hasn’t had months to harden.
After cooking a particularly oily meal, quickly wipe nearby cabinet surfaces.
Clean splashes when you notice them.
Wipe handles regularly.
And occasionally clean the areas immediately surrounding your stove.
Regular light cleaning can dramatically reduce the need for exhausting deep-cleaning sessions later.
A Simple Routine
You don’t need to clean every cabinet every day.
Instead:
After cooking: Wipe obvious splashes.
Regularly: Clean handles and frequently touched areas.
Periodically: Give cabinet doors a complete wipe-down.
Once or twice a year: Consider emptying cabinets and cleaning the interiors as part of a deeper kitchen clean. Cleaning experts commonly recommend periodic deep cleaning alongside more frequent exterior maintenance.
Why This Simple Method Works
Sometimes the best cleaning tricks aren’t really tricks at all.
Cooking residue is often oily.
Dish soap is formulated to break down grease.
Warm water helps soften buildup.
Microfiber lifts away loosened dirt.
And drying prevents excess moisture from sitting on the surface.
Simple.
But effective.
Before and After: What to Expect
If your cabinets are merely covered in grease, fingerprints, and ordinary kitchen grime, cleaning can make them look significantly brighter.
But cleaning can’t repair:
- Faded paint
- Peeling finishes
- Deep scratches
- Water-damaged wood
- Worn varnish
- Sun discoloration
If the cabinets remain dull after they’re completely clean, the actual finish may be worn.
At that point, restoration, refinishing, or repainting may be needed.
The Bottom Line
If your kitchen cabinets look dull and sticky, don’t assume you need an expensive cleaner.
Start with:
Warm water + a few drops of mild dish soap + a microfiber cloth.
Wring the cloth out well, gently work on the greasy areas, wipe again with a clean damp cloth, and dry immediately.
And before experimenting with viral mixtures containing vinegar, baking soda, or powerful cleaning chemicals, make sure they’re compatible with your particular cabinet finish.
Sometimes the difference between dull, greasy cabinets and a kitchen that looks fresh again is simply removing years of invisible cooking residue the right way. ✨🏠